Before proceeding with this guide, create a free account on the RevenueFlo Platform and set up your first project and offer campaign to manage dynamic offer paywall seamlessly.Documentation Index
Fetch the complete documentation index at: https://revenueflo.com/docs/llms.txt
Use this file to discover all available pages before exploring further.
Requirements
Xcode 13.0+ and iOS 15.0+ or later.Installation
Download config file
- Go to your RevenueFlo project dashboard.
- Select the Settings from sidebar.
- Select SDK & Code Setup → React Native and Download RevenueFlo-Info.plist
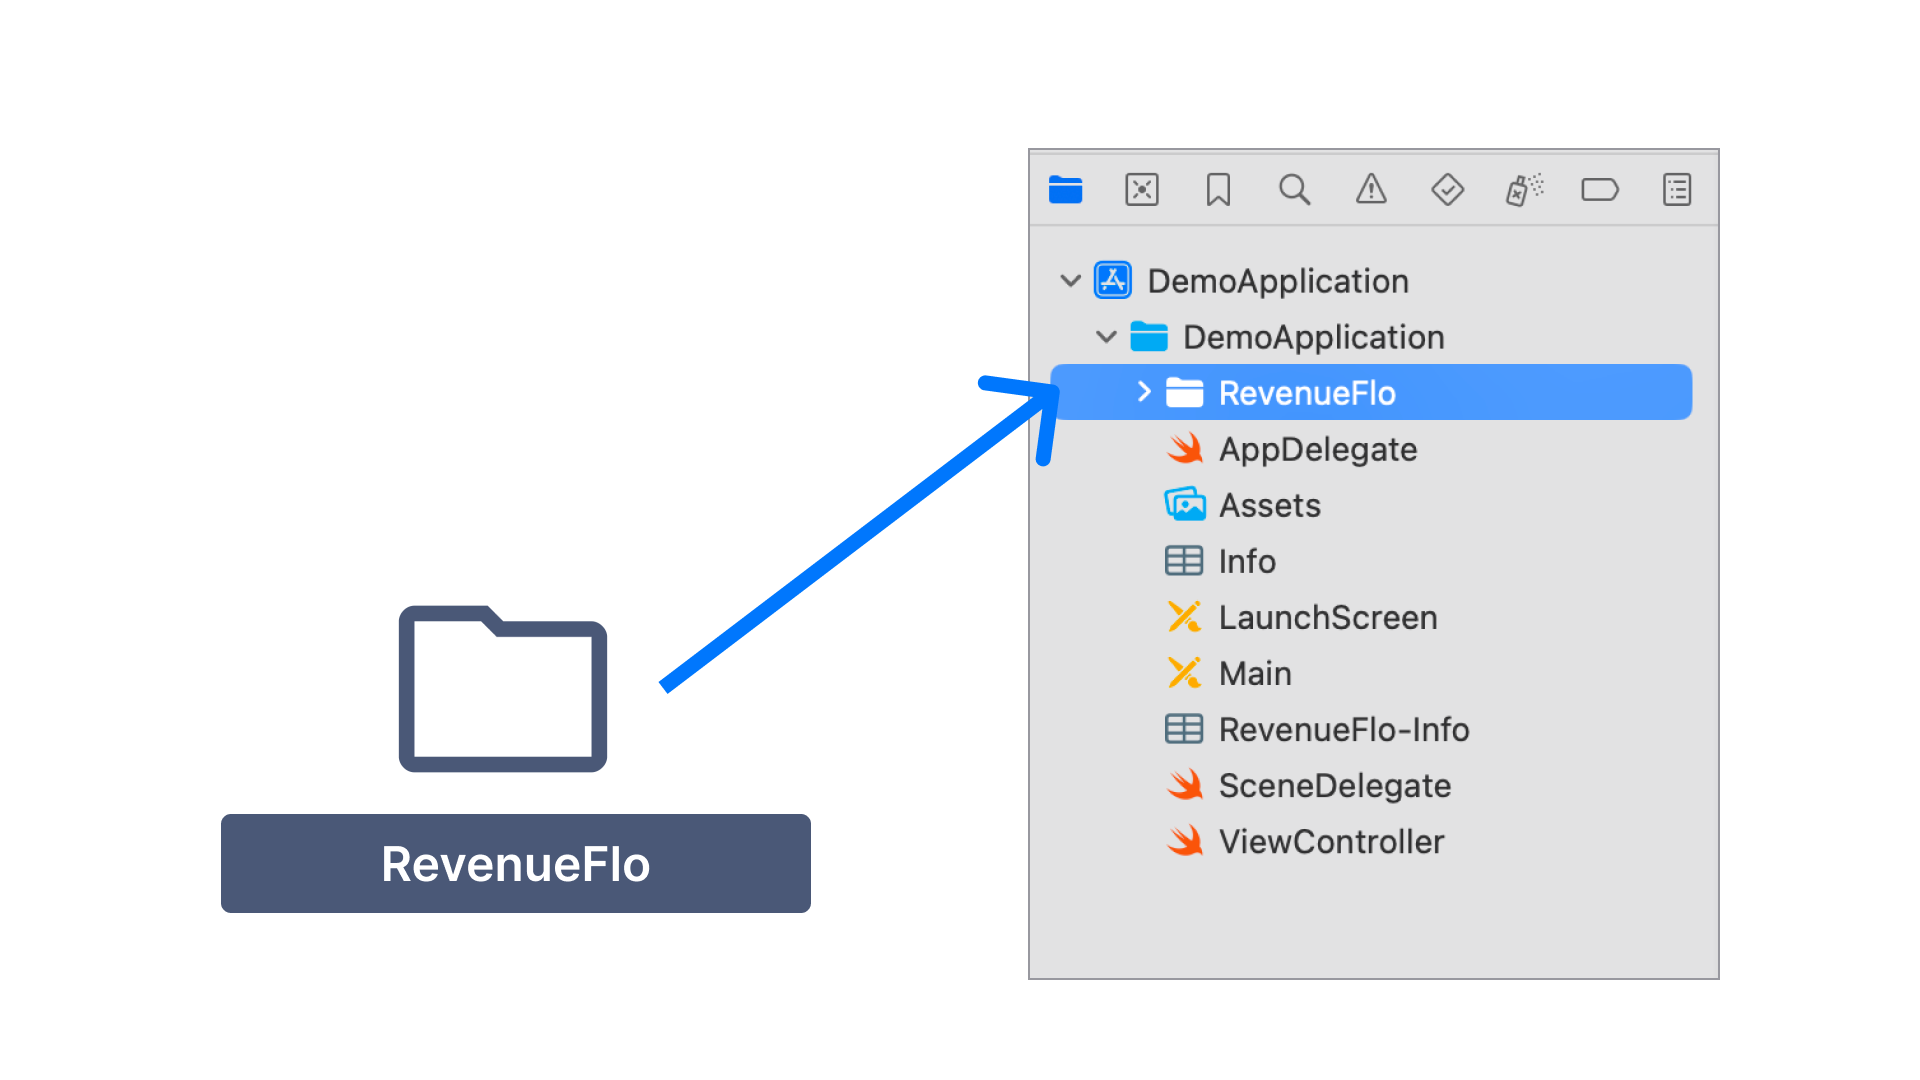
- Copy the RevenueFlo-Info.plist file you just downloaded into the root of your Xcode project inside the react-native project folder and add it to all targets.

Add RevenueFlo SDK
- Download RevenueFlo SDK
- Unzip & Copy the RevenueFlo folder from the SDK you just downloaded into the root of your Xcode project inside the react-native project folder and add it to all targets.
Configure App Attest
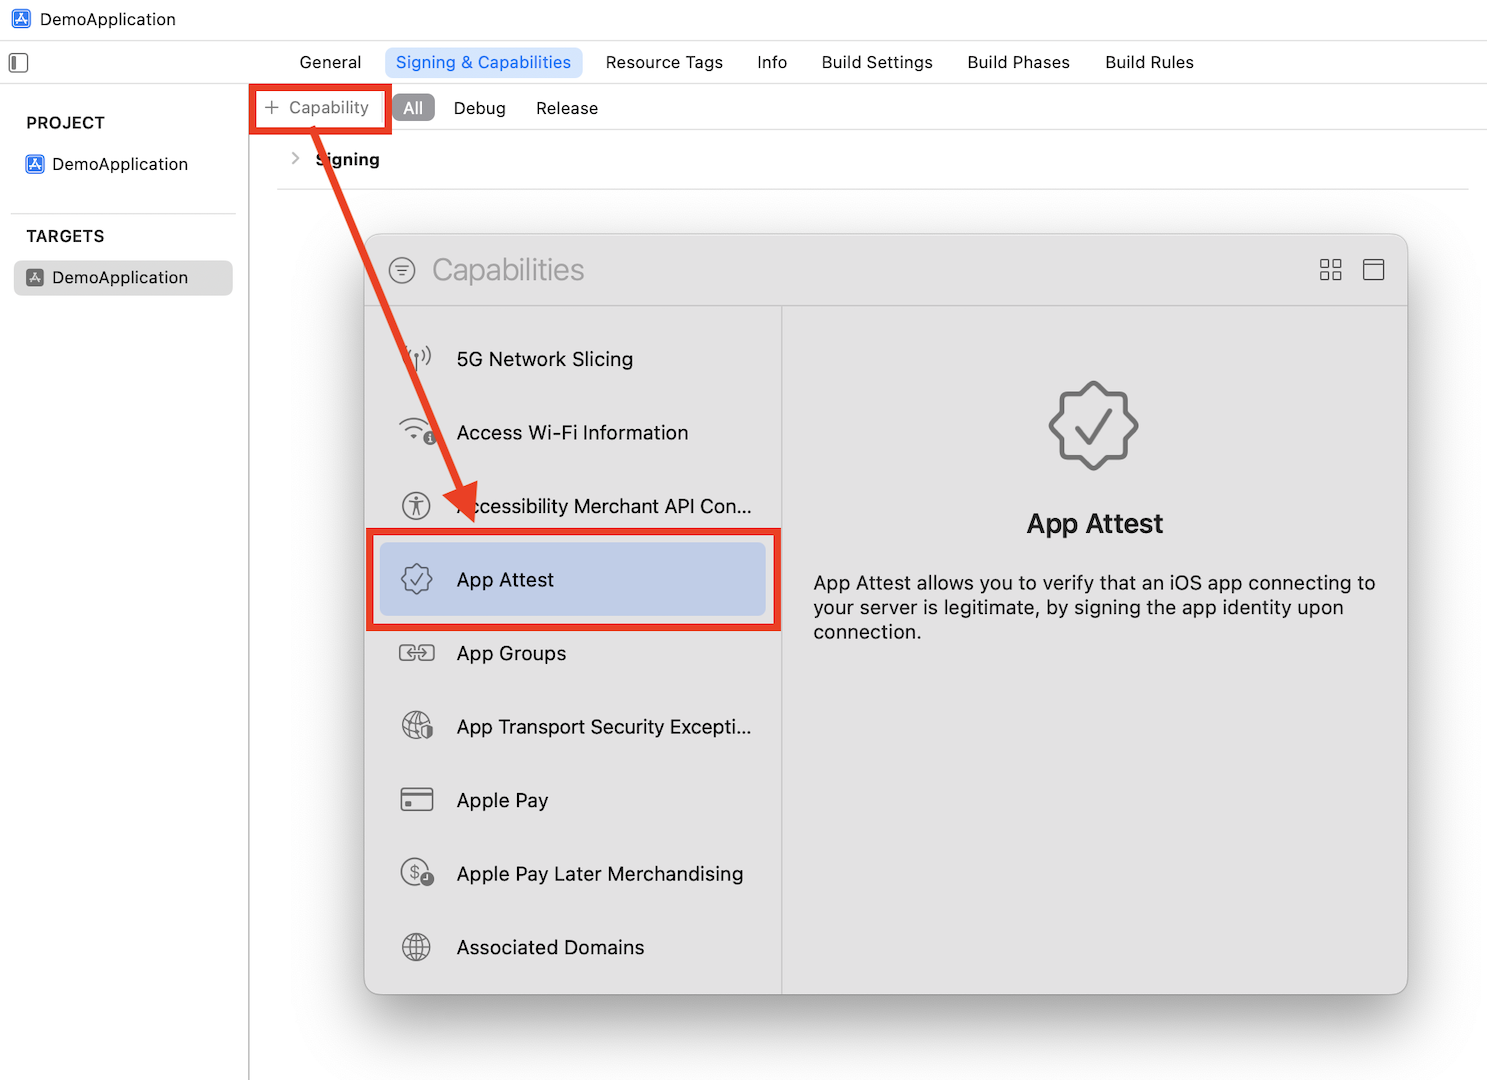
First, you need to configure the Xcode project so that the SDK can use Apple’s App Attest API to ensure that requests sent from your app come from legitimate instances of your app.
-
Add the App Attest capability for your app target.
-
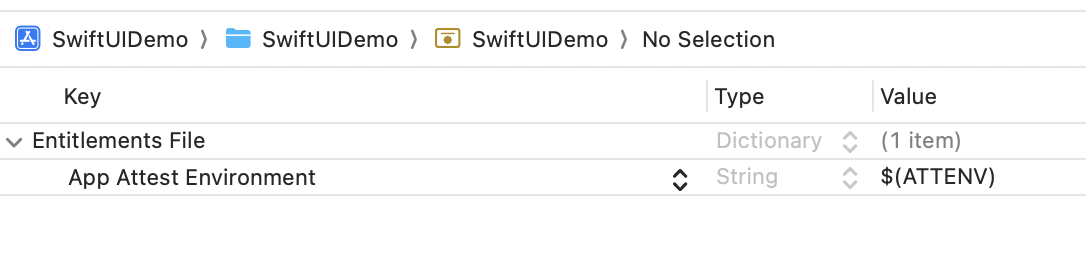
Open the .entitlements file in your Xcode project and set the App Attest Environment value to
$(ATTENV)
-
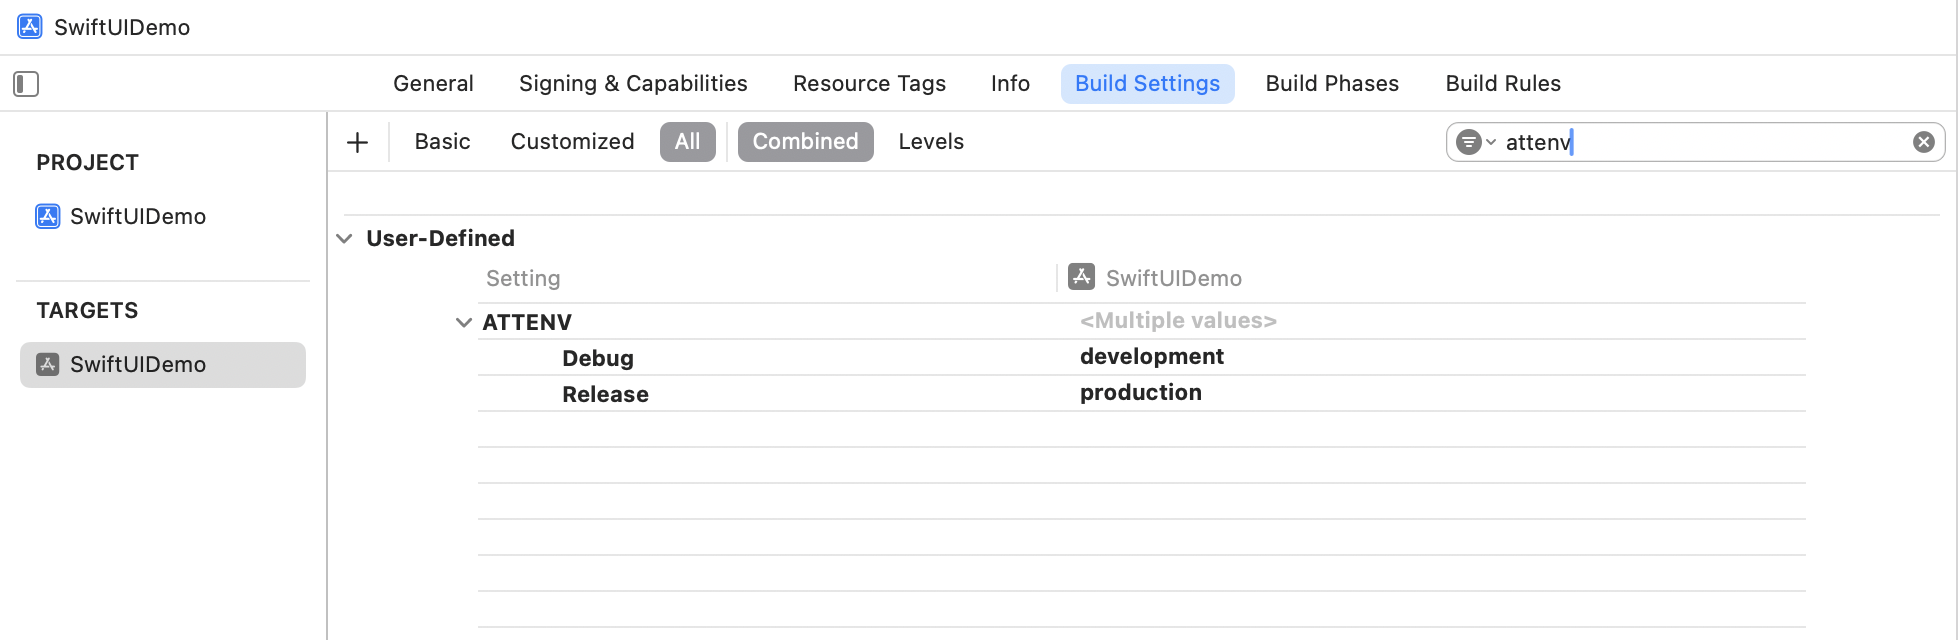
In Xcode’s Target Build Settings, create a user-defined setting named
ATTENVand set its value toproductionfor Release anddevelopmentfor Debug.
Import the SDK Code
To initialize the SDK in your React Native app, include the following in yourindex.js:
React
Present an In-app Offer
In your View, call thepresentOfferForRN() method to seamlessly present an exclusive offer to your users. Ensure to configure the offer details in the campaign dashboard before invoking.
React
Make sure you have at least one campaign active in RevenueFlo and test on a real device to experience your offer paywall exactly as your users will see it.
Example In-app Offer
Here’s the final presented offer paywall from RevenueFlo.